I usually cook with boneless chicken breasts because of the convenience, but once in a while I'll cook a whole chicken like this. It's easy, and the chicken turns out moist and tender. Also because I cook veggies in and around the chicken, the whole meal cooks in one pan.
1 roasting chicken (about 3 pounds)
1/2 celery rib, cut in pieces
1 onion, quartered
1 carrot, cut in 2" pieces
fresh herbs, optional
salt, pepper, garlic powder to taste
Preheat oven to 375. Place chicken in roasting pan, breast side up. Place veggies and herbs (I like rosemary) in the cavity and any extras on the sides. Season liberally with salt, pepper, and garlic powder. Cook for at least for 90 minutes or until cooked all the way through. Chicken is usually falling off the bone.
Sunday, October 27, 2013

Butternut Squash Bisque
This is a great fall soup and one of my all time favorites. You can add a little cayenne pepper if you like some kick.
1 T margarine or butter
1/4-1/2 cup diced onion
3/4 cup diced carrots
4 cups peeled and cubed butternut squash (about 1 large squash)
3 cups vegetable broth
salt and pepper to taste
ground nutmeg to taste
1/2 cup heavy cream (optional)
Heat the oil and melt butter in large pot over medium heat. Add onion and cook until tender.
Mix carrots and squash into the pot. Pour in vegetable broth and season with salt, pepper, and nutmeg. Bring to a boil, reduce heat, and simmer until vegetables are tender.
In a blender, puree soup mixture until smooth. Return to pot, and stir in the heavy cream. Heat through, but do not boil. Serve warm with a dash of nutmeg.
Saturday, October 27, 2012
Chicken Pot Pie
Chicken Pot Pie
This was really yummy! Recipe adapted from here.
2 carrots, sliced into 1/4 inch pieces
1 medium potato, cubed
1/2 onion, diced
1/4 cup fresh or frozen peas
3 Tbls butter
3 Tbls flour
1 1/4 cups chicken broth
3/4 cups heavy cream (I used milk)
1/2 tsp salt
1/4 tsp pepper
1/8 tsp dried thyme, crushed
1/8 tsp ground sage
2 cups cooked chicken
Pie Crust Pastry, prepared (enough for the bottom plus the top of a pie)
In a saucepan, cook carrots, potato, onion and peas in a small amount of water, covered, about 10 minutes or until crisp tender. In another pan (skillet), melt butter. Add flour, cook and stir until mixture is golden brown. Slowly add broth, cream (or milk), salt, pepper, thyme, and sage. Cook and stir 5 minutes or until thickened and smooth. Add veggies and chicken and stir until combined.
Place first pie pastry in the pie pan. Top with sauce/chicken/veggie mixture. Place second pastry over and cut slits on top.
Bake 425 degrees for 25-30 minutes (watch crust for browning).
2 carrots, sliced into 1/4 inch pieces
1 medium potato, cubed
1/2 onion, diced
1/4 cup fresh or frozen peas
3 Tbls butter
3 Tbls flour
1 1/4 cups chicken broth
3/4 cups heavy cream (I used milk)
1/2 tsp salt
1/4 tsp pepper
1/8 tsp dried thyme, crushed
1/8 tsp ground sage
2 cups cooked chicken
Pie Crust Pastry, prepared (enough for the bottom plus the top of a pie)
In a saucepan, cook carrots, potato, onion and peas in a small amount of water, covered, about 10 minutes or until crisp tender. In another pan (skillet), melt butter. Add flour, cook and stir until mixture is golden brown. Slowly add broth, cream (or milk), salt, pepper, thyme, and sage. Cook and stir 5 minutes or until thickened and smooth. Add veggies and chicken and stir until combined.
Place first pie pastry in the pie pan. Top with sauce/chicken/veggie mixture. Place second pastry over and cut slits on top.
Bake 425 degrees for 25-30 minutes (watch crust for browning).
Tuesday, January 10, 2012
Filipino Lumpia
Growing up, my family went to visit relatives in the Bay area at least once a year, usually in the summer. My grandparents, and two sets of aunts, uncles, and cousins lived there. Now that I'm older and my grandparents are gone, I really miss going. Sometimes when we were there, the family would gather at my cousins' house, and my aunt LaDonna, who is part Filipino, would cook lumpia for all us. Lumpia is basically ground beef and ground pork with finely diced veggies, all rolled up in a wrapper and deep fried. I remember us kids would sometimes help, although looking back, I am pretty sure my aunt could have made it more quickly without our "help." Anyway, it was a special treat and we all loved lumpia. This year I decided it was high time we made Filipino food for our Christmas Eve around the world tradition, centered, of course, around lumpia.

In addition to the lumpia for dinner, we had rice, pancit (a noodle/veggie dish side dish), and fried bananas.
 I had been in touch with Aunt LaDonna about how to make the lumpia and what else we could serve with it, and she was very helpful. In fact the afternoon of Christmas Eve we were surprised by a package in the mail from her. She had sent some cookies and tamarind which she remembered eating in the Philippines. We ate those, along with mangos, mango pudding (probably not authentic), and some sesame ball treats I bought at an Asian market.
 Christmas Eve food is always an adventure at our house. I don't know if we'll eat the other stuff we made again any time soon, but I am super excited about the leftover lumpia I have stashed in the freezer! Here's the recipe:
Lumpia
Ingredients (no exact measurements, but it's hard to go wrong):
Defrost lumpia wrappers completely on counter if frozen. Finely chop or dice veggies (I used my food processor). Mix raw meat, veggies, and seasonings in a large bowl. In a small bowl, mix together some flour and water to make a paste. Open lumpia package and cut large lumpia wrappers into four smaller squares. Keep wrappers covered with a damp cloth to prevent them from drying out. Pull off a small square lumpia wrapper from the rest. Place filling along one edge and roll up, sealing the seam with a flour/water mixture. Leave the ends open. Repeat. Keep filled lumpia covered with another damp towel to prevent drying out. Deep fry lumpia in a wok or deep fryer (I did mine four at a time in our deep fryer).
Serve with sweet and sour sauce (recipe below).
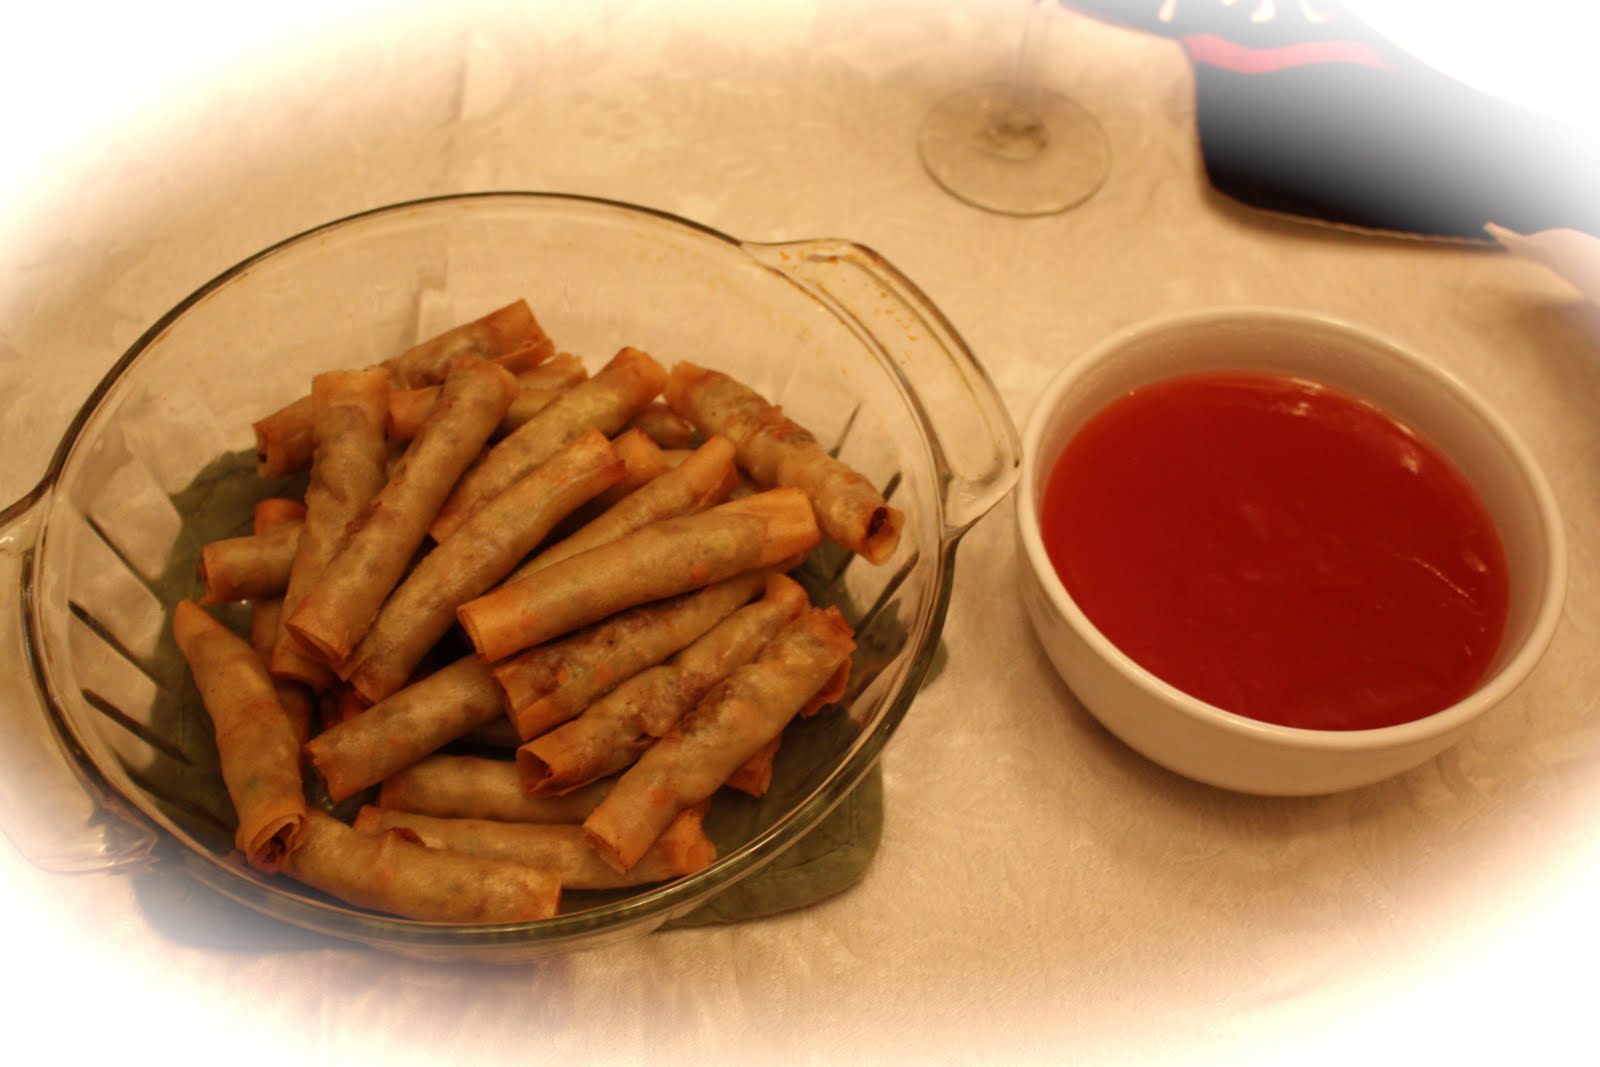
{lumpia and sweet and sour sauce}
In addition to the lumpia for dinner, we had rice, pancit (a noodle/veggie dish side dish), and fried bananas.
 I had been in touch with Aunt LaDonna about how to make the lumpia and what else we could serve with it, and she was very helpful. In fact the afternoon of Christmas Eve we were surprised by a package in the mail from her. She had sent some cookies and tamarind which she remembered eating in the Philippines. We ate those, along with mangos, mango pudding (probably not authentic), and some sesame ball treats I bought at an Asian market.
 Christmas Eve food is always an adventure at our house. I don't know if we'll eat the other stuff we made again any time soon, but I am super excited about the leftover lumpia I have stashed in the freezer! Here's the recipe:
Lumpia
Ingredients (no exact measurements, but it's hard to go wrong):
ground beef and ground pork*
carrots
brocoli
green onions
large square lumpia wrappers**
garlic powder, salt, pepper
flour and water mixture
*Equal parts of each, or to your preference. One pound total of meat makes a lot of lumpia. I think next time I will use more pork than beef. Some recipes call for shrimp also, but we never had it that way.
**You can find lumpia wrappers in a refrigerated or frozen section at Asian markets. They are pretty similar to spring roll wrappers, which might work in a pinch. Won ton wrappers are too thick.
Directions:
Defrost lumpia wrappers completely on counter if frozen. Finely chop or dice veggies (I used my food processor). Mix raw meat, veggies, and seasonings in a large bowl. In a small bowl, mix together some flour and water to make a paste. Open lumpia package and cut large lumpia wrappers into four smaller squares. Keep wrappers covered with a damp cloth to prevent them from drying out. Pull off a small square lumpia wrapper from the rest. Place filling along one edge and roll up, sealing the seam with a flour/water mixture. Leave the ends open. Repeat. Keep filled lumpia covered with another damp towel to prevent drying out. Deep fry lumpia in a wok or deep fryer (I did mine four at a time in our deep fryer).
Serve with sweet and sour sauce (recipe below).
Notes: It is very helpful to have a second person working with you because the wrapping is time-intensive and the wrappers dry out easily. Also, I make the smaller lumpia and wrap them with the ends open because that is how my aunt did it. You can use the full sized square wrappers with a larger volume of filling and wrap it like an eggroll if you prefer, but I think you may need to precook the meat if you go that route.
Simple Sweet and Sour Sauce
In a small saucepan combine 1 cup of white vinegar and 1 cup of sugar and stir until sugar is dissolved. Add 5-6 tablespoons of ketchup and stir until well mixed and bubbly. Mix 2 tablespoons of cornstarch with a little water. Mix till consistency is smooth. If too thick add more water. Add 1/2 of cornstarch mix to pot, stirring constantly. Sauce will thicken as it heats; if it doesn't add more of constarch mix. Once it gets to the consistency you like remove from the heat. It will thicken a little more as it cools.
In a small saucepan combine 1 cup of white vinegar and 1 cup of sugar and stir until sugar is dissolved. Add 5-6 tablespoons of ketchup and stir until well mixed and bubbly. Mix 2 tablespoons of cornstarch with a little water. Mix till consistency is smooth. If too thick add more water. Add 1/2 of cornstarch mix to pot, stirring constantly. Sauce will thicken as it heats; if it doesn't add more of constarch mix. Once it gets to the consistency you like remove from the heat. It will thicken a little more as it cools.
Monday, January 9, 2012
Sticky Buns
 This is another Thomson Christmas tradition. It's very quick and easy to prepare, and a hit with the kids.
Sticky Buns
Ingredients:
1/2 cup margarine or butter
1/2 cup brown sugar
1 t cinnamon
14-16 Rhodes frozen rolls
chopped walnuts or pecans
Directions:
Spray pan(s) with cooking spray (a large bundt pan or several bread pans - something with a higher edge than just a casserole pan if possible. If not, the casserole pan will still work). Sprinkle half of the nuts on the pan, then place rolls on top. In a small saucepan, warm margarine, brown sugar, and cinnamon until sugar dissolves. Pour mixture over rolls and sprinkle remaining nuts on top. Cover with sprayed plastic wrap. Let rise until rolls are double in size. (Usually I put it together right before I go to bed and let it rise overnight.) Bake at 350 for 20-25 minutes. Let cool for just a few minutes, then turn over unto serving plates.
Wednesday, January 4, 2012
Green Salsa
 Quick, easy, and delicious! Eat with chips, tacos, burritos, or with a spoon. :o)
Green Salsa
Ingredients:
1 28 oz. can tomatillos, drained of water
1/4 bunch of cilantro - stems mainly cut off
1/4-1/3 cup sugar (to taste)
1/3 of a 4 oz. can of chopped jalepeno peppers*
Instructions:
Blend all together in a blender and chill in the fridge for a couple of hours.
*I didn't have any, and I like it mild, so I used a partial can of green chiles
Sunday, September 18, 2011
The BEST Homemade Granola Bars
 I previously posted another granola bar recipe that I really like, but this one has totally replaced it in my kitchen. They are just the right balance between chewy and crispy, and they freeze great if you can manage to keep any around long enough. They disappear quickly around here. I've been making double the recipe (two pans), cutting them and freezing them in snack sized ziplocks. My 2nd grader loves them and can grab one out herself and stick it in her backpack for mid-morning snack time at school.
I slightly changed the original recipe, decreasing the peanut butter and adding some regular butter/margarine to make them a little less rich/dense. Thanks to my sister-in-law Tiffany for fabulous original recipe!
Granola Bars
Ingredients:
2 & 1/2 c. oats 2 c. rice crispies 1/4 c. nuts (almonds, pecans, peanuts, etc.)* 1/4 c. flax seed or wheat germ* 1/4 c. shredded coconut* 1/2 teaspoon salt 2/3 c. brown sugar 2/3 c. honey 1/4 c. peanut butter 1/4 c. butter or margarine 1 teaspoon vanilla *You can use whatever you want for all three of these 1/4 cups. Some ideas to consider: raisins, Craisins, a second nut, mini chocolate chips, etc. If you choose to put in chocolate chips, reserve them and press them into the top after you have spread the bars into the pan - otherwise they will melt right in. I often do the three ingredients listed and in addition press in chocolate chips at the end.
Grease or line a 9x13 pan. In large bowl mix the oats, rice crispies, salt, nuts, flax seed, and coconut. Set aside.
Measure the brown sugar, honey, and peanut butter into a small saucepan. Stirring, bring these to a boil. Boil for about a minute. If you boil too long, the bars will be too crispy (in my opinion--some people may like them crispier).Remove from heat and stir in the vanilla.
Dump the gooey stuff into the dry stuff and stir. Press it into your pan. Let them cool, then cut into bars.

Saturday, August 20, 2011
Three Great Fish Recipes
Lately I've been buying bags of frozen tilapia fillets, and finding lots of great ways to eat them. Generally we are a grilling family when it comes to fish, and I still think grilling is the only way to do salmon. But tilapia is a smaller, milder, more delicate fish, and there are lots of ways to make it delicious in the kitchen. Here are three of my favorite recipes for tilapia, and they can also be made with other mild white fish like cod or halibut.
Coconut-Almond Crusted Tilapia
Parmesan-Garlic Tilapia Sticks
Fish and Chips (I actually modify this recipe somewhat so I'll have to post that sometime)
Coconut-Almond Crusted Tilapia
Parmesan-Garlic Tilapia Sticks
Fish and Chips (I actually modify this recipe somewhat so I'll have to post that sometime)
Wednesday, June 8, 2011
Hello from the South!
We've been in our new home for about a week and a half now, and we are loving the green, the water, and the beautiful trails around here. We're getting to the know the area, Mr. J is busy with his new job, and I'm trying to balance keeping the kids entertained during the summer with getting my house unpacked and organized.
When it came to meal planning, I cut myself a lot of necessary slack before, during, and after our move. But I can only take so much eating out and so many pre-packaged foods. My kitchen is fully unpacked, and although we still have tons of boxes around the house to tackle, I'm hoping to get back into the swing of "real" food--including a lot more made from scratch meals and fresh veggies and fruits.
One thing I struggle with when planning dinners, is that I tend to choose recipes that require a lot of preparation and time. I enjoy cooking. However, I have a lot of other things to do, and the hour before dinner tends to be a busy (and needy) time around here. So, my new goal when planning a menu for the week (or two? or the month? I think that might be better!) is: for every time-consuming meal I have planned, include two that are relatively simple.
This will be a challenge for me. One thing that will help is making large batches of whatever I am making (sauce, dough, etc.) and freezing for later use. So I'm going to try and implement that more often too.
I've been going through my Google bookmarks, and here are a few meals I am excited to try out in the next month or so. I have rated them on a scale of 1-5 stars for ease of preparation - 1 star being very simple to throw together, and 5 stars being pretty time-consuming. It seems I need a few more simple meals to add to this list. Ideas, anyone?
Non-vegetarian dinners:
Garlic Chicken Bow Tie Pasta ***
Chinese Orange Chicken *** (We love the stuff from Panda but I've never had much luck making my own - I have high hopes for this one)
Pesto Chicken ** (one star if using jarred pesto, but I like to make mine)
Beef Cheddar Baked Flautas ** (Use the leftover beef for sandwiches or shepard's pie)
Coconut Almond Crusted Tilapia ***
Sweet Potato Foil Packet Tacos ***
Vegetarian dinners:
Roasted Vegetable Lasagna ****
Mushroom and Spinach Lasagna ****
Butternut Squash Mac and Cheese ***
Caprese Panini (add turkey to make more filling for those who want it) **
Crispy Southwest Wraps ***
Spinach Curry Soup ** (recipe from my sis-in-law)
Snack:
Homemade Granola Bars *** (This is a new recipe I'm really excited to try!)
When it came to meal planning, I cut myself a lot of necessary slack before, during, and after our move. But I can only take so much eating out and so many pre-packaged foods. My kitchen is fully unpacked, and although we still have tons of boxes around the house to tackle, I'm hoping to get back into the swing of "real" food--including a lot more made from scratch meals and fresh veggies and fruits.
One thing I struggle with when planning dinners, is that I tend to choose recipes that require a lot of preparation and time. I enjoy cooking. However, I have a lot of other things to do, and the hour before dinner tends to be a busy (and needy) time around here. So, my new goal when planning a menu for the week (or two? or the month? I think that might be better!) is: for every time-consuming meal I have planned, include two that are relatively simple.
This will be a challenge for me. One thing that will help is making large batches of whatever I am making (sauce, dough, etc.) and freezing for later use. So I'm going to try and implement that more often too.
I've been going through my Google bookmarks, and here are a few meals I am excited to try out in the next month or so. I have rated them on a scale of 1-5 stars for ease of preparation - 1 star being very simple to throw together, and 5 stars being pretty time-consuming. It seems I need a few more simple meals to add to this list. Ideas, anyone?
Non-vegetarian dinners:
Garlic Chicken Bow Tie Pasta ***
Chinese Orange Chicken *** (We love the stuff from Panda but I've never had much luck making my own - I have high hopes for this one)
Pesto Chicken ** (one star if using jarred pesto, but I like to make mine)
Beef Cheddar Baked Flautas ** (Use the leftover beef for sandwiches or shepard's pie)
Coconut Almond Crusted Tilapia ***
Sweet Potato Foil Packet Tacos ***
Vegetarian dinners:
Roasted Vegetable Lasagna ****
Mushroom and Spinach Lasagna ****
Butternut Squash Mac and Cheese ***
Caprese Panini (add turkey to make more filling for those who want it) **
Crispy Southwest Wraps ***
Spinach Curry Soup ** (recipe from my sis-in-law)
Snack:
Homemade Granola Bars *** (This is a new recipe I'm really excited to try!)
Wednesday, April 20, 2011
Coconut Cream Pie
This is one of our favorite pies, Mr. J's in particular:
 Old Fashioned Coconut Cream Pie
Ingredients:
1 1/2 cups half-and-half
1 1/2 cups coconut milk (in a can in the Asian section)
2 eggs
3/4 cup white sugar
1/3 cup cornstarch
1/4 t salt
1 cup flaked coconut, toasted
1 t vanilla extract
1 (9 inch) pie shell, baked
1 cup whipped topping
Directions:
In a large bowl, combine half-and-half, coconut milk, eggs, sugar, cornstarch, and salt. Microwave on high, stopping to whisk it every minute or so, until thickened. Stir in 3/4 cup of the coconut and the vanilla extract.
Pour into pie shell and chill 2 to 4 hours, or until firm. Top with whipped topping, and with remaining 1/4 cup of coconut.
Note: To toast coconut, spread it in an ungreased pan and bake in a 350 degree oven 5-7 minutes, or until golden brown, stirring occasionally.
 Old Fashioned Coconut Cream Pie
Ingredients:
1 1/2 cups half-and-half
1 1/2 cups coconut milk (in a can in the Asian section)
2 eggs
3/4 cup white sugar
1/3 cup cornstarch
1/4 t salt
1 cup flaked coconut, toasted
1 t vanilla extract
1 (9 inch) pie shell, baked
1 cup whipped topping
Directions:
In a large bowl, combine half-and-half, coconut milk, eggs, sugar, cornstarch, and salt. Microwave on high, stopping to whisk it every minute or so, until thickened. Stir in 3/4 cup of the coconut and the vanilla extract.
Pour into pie shell and chill 2 to 4 hours, or until firm. Top with whipped topping, and with remaining 1/4 cup of coconut.
Note: To toast coconut, spread it in an ungreased pan and bake in a 350 degree oven 5-7 minutes, or until golden brown, stirring occasionally.
Monday, April 11, 2011
Chicken Cordon Bleu
I'm way behind on my family blog and too lazy to tackle it right now, so I'm updating here instead. Our house-hunting trip was absolutely exhausting but we are now under contract with a house we LOVE. Cross your fingers that the home inspection and everything else goes well, and that I don't lose my sanity with Mr. J now living across the country (we'll join him in six weeks or so).
Speaking of which, before our trip, I made sure to make one of Mr. J's favorite meals, which I also happen to love. Here it is: my take on Chicken Cordon Bleu.
 Chicken Cordon Bleu
Ingredients:
4 boneless, skinless chicken breast halves
4 slices swiss cheese
4 slices ham
3 tablespoons all-purpose flour
1 teaspoon paprika
6 tablespoons butter
1/2 cup dry white wine or chicken broth
1 teaspoon chicken bouillon granules
1 tablespoon cornstarch
1 cup heavy whipping cream
Directions:
Pound chicken breasts to flatten if they are thick. Place a cheese and a ham slice on each breast within 1/2 inch of the edges. Fold the edges of the chicken over the filling, and secure with toothpicks. Mix the flour and paprika in a small bowl, and coat the chicken pieces well.
Heat the butter in a large skillet over medium-high heat, and cook the chicken until browned on all sides. Add the wine and/or bouillon. Reduce heat to low, cover, and simmer for 30 minutes, until chicken is no longer pink and juices run clear.
Remove the toothpicks, and transfer the breasts to a warm platter. Blend the cornstarch with the cream in a small bowl, and whisk slowly into the skillet. Cook, stirring until thickened, and pour over the chicken. Serve warm with mashed potatoes.
Stay tuned for dessert!
 Chicken Cordon Bleu
Ingredients:
4 boneless, skinless chicken breast halves
4 slices swiss cheese
4 slices ham
3 tablespoons all-purpose flour
1 teaspoon paprika
6 tablespoons butter
1/2 cup dry white wine or chicken broth
1 teaspoon chicken bouillon granules
1 tablespoon cornstarch
1 cup heavy whipping cream
Directions:
Pound chicken breasts to flatten if they are thick. Place a cheese and a ham slice on each breast within 1/2 inch of the edges. Fold the edges of the chicken over the filling, and secure with toothpicks. Mix the flour and paprika in a small bowl, and coat the chicken pieces well.
Heat the butter in a large skillet over medium-high heat, and cook the chicken until browned on all sides. Add the wine and/or bouillon. Reduce heat to low, cover, and simmer for 30 minutes, until chicken is no longer pink and juices run clear.
Remove the toothpicks, and transfer the breasts to a warm platter. Blend the cornstarch with the cream in a small bowl, and whisk slowly into the skillet. Cook, stirring until thickened, and pour over the chicken. Serve warm with mashed potatoes.
Stay tuned for dessert!
Saturday, April 2, 2011
Giveaway Winner!
I used random.org to generate the winning number for the giveaway. The winner is ....
#4 Lovely Domestic Diva! She said:
Those are both great ideas! Thanks Lovely Domestic Diva! I will email you your gift code for CSN stores right away.
And thanks everyone else who contributed. Since Mr. J is starting his new job down south soon, and I'll be single-parenting for a little while until school gets out and we can join him, I'm going to need lots of easy meals to throw together. No slaving away on anything complicated ... the kids usually appreciate simple foods more anyway. I'll probably do a post soon with all of my (and your) simple kid-friendly ideas so I can have them in one place.
Meanwhile, I do have one extra special meal in mind that I'm going to cook for Mr. J before he moves. So stay tuned for that!
#4 Lovely Domestic Diva! She said:
Our favorite simple meal is a big salad with all sorts of chopped veggies and diced leftover chicken or boiled egg or nuts for protein. No cook, yummy, and my little one loves it (especially if he can pick the veggies).
Frittatas [baked omelets -- so there's no flipping] are another favorite.
Those are both great ideas! Thanks Lovely Domestic Diva! I will email you your gift code for CSN stores right away.
And thanks everyone else who contributed. Since Mr. J is starting his new job down south soon, and I'll be single-parenting for a little while until school gets out and we can join him, I'm going to need lots of easy meals to throw together. No slaving away on anything complicated ... the kids usually appreciate simple foods more anyway. I'll probably do a post soon with all of my (and your) simple kid-friendly ideas so I can have them in one place.
Meanwhile, I do have one extra special meal in mind that I'm going to cook for Mr. J before he moves. So stay tuned for that!
Wednesday, March 30, 2011
Granola Bars
{Don't forget to enter the giveaway (below) by Friday!}
 I discovered these granola bars a few years ago and like to whip them up every now and again. They are a great alternative to the store bought variety--more nutritious plus easier on the budget. Even better, everyone enjoys them, kids and grown-ups alike. Adapted from here.
Ingredients:
2 cups rolled oats
3/4 cup packed brown sugar
1/2 cup ground flax seed (or wheat germ)
3/4 t ground cinnamon
1 cup all-purpose flour
3/4 t salt
1/2 cup honey
1 egg
1/2 cup vegetable oil
2 t vanilla extract
chocolate chips to taste
Optional ingredients: flaked coconut, raisins, other dried fruit (I included coconut. Also, note that chocolate chips are NOT optional. Not for me. )
Instructions:
Preheat the oven to 350 degrees F (175 degrees C). Generously grease a 9x13 inch baking pan.
Mix together the oats, brown sugar, flax seed, cinnamon, flour, and salt. Make a well in the center, and pour in the honey, egg, oil, and vanilla. Mix well (so much easier if you use your hands). Spread mixture evenly into pan.
Bake 25-30 minutes or until bars begin to turn golden at the edges. Cool for 5-10 minutes, then cut into bars while still warm (if you wait too long they will be harder to cut).
 Enjoy!
Tuesday, March 29, 2011
Review and CSN Stores Giveaway
 A few weeks ago I had the opportunity to choose a product from CSN stores to review. They have a huge selection of kitchen stuff as well as practically everything else under the sun. I was looking at getting some decor or a new fancy kitchen gadget, but then my trusty blender broke. I can't go very long without a blender, so that's what I ended up ordering. Below is the review I submitted to CSN of my new, 12-Speed Osterizer Blender.
And now for the fun part! I have a $20 gift code to give away to one lucky reader.
Here's what you have to do to enter:
- Leave me a comment telling about your favorite simple, HEALTHY, kid-friendly meal. I want to do a whole bunch of advance meal planning the next month or so, and I want it to be simple stuff. And I'm hoping this will jump-start my planning.
- Leave your email address in the comment so I can contact you if you win.
- That's it. You don't have to subscribe or tweet or anything like that. :)
Here's a link to all of CSN Stores. And here's a link to the kitchen stuff.
Originally submitted at CSN Stores

- 12 speed blender
- 450 Watts
- Sleek slope design for attractive counter display
- 5-Cup scratch resistant and dishwasher safe glass jar
- Exclusive All-Metal Drive system for power and extra durability
Great Blender!
By Janell from Soutwest, USA on 3/29/2011
I got this blender to replace my other Oster blender when the motor burned out (after several years). I am pretty hard on blenders--I use them a lot to make smoothies. I really like the glass jar and so far I'm just as pleased with this one as my old one. It blends quickly and uniformly. Does great with ice. I don't know if there's a blender out there that would last me more than a few years. But so far this one is working great!
(legalese)
Monday, March 28, 2011
Texas Caviar
 So good I could eat it with a spoon. Although I do prefer it with tortilla chips. Or quesadillas. Or burritos. (Etc.)
Texas Caviar
1 can shoepeg corn
1 can black-eyed peas
1 can diced green chilies (I use half a can)
4-6 tomatoes, diced
1 bell pepper diced (I like orange or yellow best but I used red in this batch)
diced: cilantro, green onions, garlic (to taste)
¼-1/2 cup zesty italian dressing (sometimes I use fresh lime juice and cut back on the dressing)
1/2 - 2 jalapenos, depending on how hot you like it (optional)
Salt, pepper, and Tabasco to taste (I never include Tabasco)
Mix together in a big bowl and chill overnight for best flavor (I usually can’t wait that long).
Monday, March 21, 2011
Menu Plan Monday
Time for Menu Plan Monday!
 {This is a great loaded baked potato soup that I'll post sometime. It's not the same, but seems similar to the potato leek soup we're having this week.}
Spring break is over and with it I'm hoping some bad eating habits. We went out to eat a lot and had a lot of big family meals, which was great and what vacation is all about right? But now it's time to get back on schedule and back to meal planning. Here's what's on the menu this week:
 {This is a great loaded baked potato soup that I'll post sometime. It's not the same, but seems similar to the potato leek soup we're having this week.}
Spring break is over and with it I'm hoping some bad eating habits. We went out to eat a lot and had a lot of big family meals, which was great and what vacation is all about right? But now it's time to get back on schedule and back to meal planning. Here's what's on the menu this week:
Creamy Potato Leek Soup and rolls
Pork Chops and scalloped potatoes, broccoli (Mr. J is cooking this, can't wait for that!)
Flautas (w/leftover pork) and homemade salsa, refried beans
Homemade mac and cheese, salad, bread
Pizza/out to eat with family
Wednesday, March 16, 2011
Chicken Chardon
 {Chicken Chardon pairs well with potatoes, in this case the cheesy variety}
This is another favorite from Mr. J's family. Chicken is breaded in a garlic, Parmesan, and bread crumb combo, baked in lemon butter and topped with breaded mushrooms. It cooks up tender and full of flavor; just try not to think about the amount of butter you are consuming!
Ingredients:
4-6 chicken breasts (boneless, skinless)
1 egg
salt and pepper
2 t garlic powder (divided)
1 cup Italian-seasoned bread crumbs
1/2 cup Parmesan cheese
1 cup butter
1 T lemon juice
1 t parsley
1/2 pound mushrooms, sliced
Directions:
Preheat oven to 375. Line a large baking dish (9X13) with foil for easy clean up later. Spray foil with cooking spray.
In a small bowl, beat egg, salt, pepper, and 1/2 t garlic powder. In a separate bowl, combine bread crumbs, 1/2 t garlic powder, and Parmesan cheese.
Flatten each chicken breast and cut into two pieces if desired (I like smaller servings). Dip each piece of chicken into egg mixture, then roll in bread crumbs, pressing to coat well. Arrange in baking dish.
Melt butter with 1 teaspoon garlic powder, lemon juice, and parsley. Pour half over chicken. Bake 25-30 minutes. Meanwhile, combine remaining butter with mushrooms and enough remaining bread crumbs to coat the mushrooms. After the 25-30 minutes, remove chicken and cover with mushroom mixture. Return to the oven for 10 minutes.
 {If it looks like there is something missing from this plate, that's because there is. There was no sauteed asparagus left by the time I got around to taking a picture of our leftovers.}

Sunday, March 13, 2011
Creamy Chicken Noodle Soup

This is one of Mia's favorite recipes. It comes from my friend Bethany who always makes the best food! I've modified it just a little for convenience sake, her original recipe is here.
Ingredients:
- 2 chicken breasts, precooked and shredded (best method is in the crock pot w/some broth, seasoned salt, and pepper)
- 1/2 medium onion, diced
- 1 1/2 C carrots, cut up (or 1/2 bag of baby carrots cut up)
- 3 stocks of celery, chopped
- 2 T. butter
- 6 chicken bullion cubes (added at different times)
- seasoned salt and pepper
- 8 1/4 cups water
- 1/2 package of small egg noodles (8-10 oz.)
- 2 cans cream of chicken soup*
Instructions:
Put chopped onion, celery, and carrots in the bottom of a large pot with butter, ¼ cup water, 1 bullion cube, and a dash each of seasoned salt and pepper. Stir, cover, and steam on medium heat until veggies are almost tender (about 10-15 minutes).
Add 8 cups of water and remaining 5 bullion cubes, and bring to a boil. Once boiling, add noodles and boil for about 8 minutes or according to package.
Finally, add shredded chicken, canned soup, and ¼ t each of seasoned salt and pepper. Cook until cream of chicken soup has dissolved and soup is creamy. Add more water if soup is too thick.
*Here is a substitution for the cream of chicken soup when I don’t have it on hand: Melt 4 T butter in a saucepan, then stir in about 8-9 T flour. Add 1 cup milk, salt and pepper, and cook until thickened. Add this to the pot along with a few big spoonfuls of sour cream.
Thursday, March 10, 2011
Piña Colada Smoothie
 I love to make smoothies. I am pretty tough on blenders, especially in the hot summers. I never measure the ingredients for my smoothies or follow an exact recipe. However I usually include yogurt, a variety of fruit (bananas and strawberries are my favorites), liquid (milk, juice, or water, or a combination), and ice if needed (if I'm using frozen fruit sometimes I don't need the ice).
Once in a while I go out on a limb and throw in a veggie or two, like a carrot, with varying success. (Sometimes the kids will notice and tell me it tastes funny.)
The other night, I made what Mia called "The best yummy drink you've ever made, mom!" Again, no exact measurements, but here's how it went:
Piña Colada Smoothie
1 and 1/2 fresh bananas
several large spoonfuls of vanilla yogurt (maybe about a cup worth?)
canned pineapple juice and tidbits (I opened a large can and used all the liquid plus the tidbits that were left after making Hawaiian pizza)
cream of coconut* - squeeze for a couple of seconds
water and ice to desired thickness and texture
Blend and enjoy! Little umbrellas optional.
*The brand of cream of coconut that I have is Coco Real, and I found it in the liquor section:

Thursday, February 24, 2011
Attack of the kitchen gadgets
So, I'm a little excited about my first ever giveaway coming up soon! Stay tuned for a review of something kitchen-y from CSN stores, and for your chance to do a little shopping there yourself. CSN sells just about everything, from flooring to wood swing sets to book racks (love!) to decor to of course, kitchen stuff.
About that kitchen stuff. I'm all for appliances that make my life easier and meal prep faster in the kitchen. But sometimes I feel like there are so many "useful" gadgets that if I got them all they would quickly take over my house. Space is at a premium in my kitchen. If I'm going to be an appliance that only has one function, it better be either small, or so convenient that I just can't do without it. Thus I don't have a salsa maker, a fondue pot, or a hot dog toaster (ha!).
I am very fond of certain appliances. I use my bread maker constantly. My cooking world opened up so much when I finally bought a food processor. My blender gets a lot of use too, as does my rice maker. (I know it's easy enough to cook rice on the stove, but I just love the "push a button and forget about it" approach.)
Currently on my wish list? A new wheat grinder; I have an old stone grinder but would like to upgrade to something smaller and more convenient eventually--maybe this one? And also, a new Bosch mixer. Mr. J, in two strokes of thrift-store good luck, actually purchased our wheat grinder and our Bosch mixer secondhand. I loved the Bosch while it lasted--I used to make huge batches of cookie dough in it.
Also, I'm really debating the usefulness of a tortilla press. On the one hand, it looks a little bulky and it only has one function. Plus, I wonder how well they really work? On the other hand, I made tortillas last night and it really is a very manual, time-consuming process. A press might be worth it.
I think I'll do a little more kitchen gadget window shopping!
About that kitchen stuff. I'm all for appliances that make my life easier and meal prep faster in the kitchen. But sometimes I feel like there are so many "useful" gadgets that if I got them all they would quickly take over my house. Space is at a premium in my kitchen. If I'm going to be an appliance that only has one function, it better be either small, or so convenient that I just can't do without it. Thus I don't have a salsa maker, a fondue pot, or a hot dog toaster (ha!).
I am very fond of certain appliances. I use my bread maker constantly. My cooking world opened up so much when I finally bought a food processor. My blender gets a lot of use too, as does my rice maker. (I know it's easy enough to cook rice on the stove, but I just love the "push a button and forget about it" approach.)
Currently on my wish list? A new wheat grinder; I have an old stone grinder but would like to upgrade to something smaller and more convenient eventually--maybe this one? And also, a new Bosch mixer. Mr. J, in two strokes of thrift-store good luck, actually purchased our wheat grinder and our Bosch mixer secondhand. I loved the Bosch while it lasted--I used to make huge batches of cookie dough in it.
Also, I'm really debating the usefulness of a tortilla press. On the one hand, it looks a little bulky and it only has one function. Plus, I wonder how well they really work? On the other hand, I made tortillas last night and it really is a very manual, time-consuming process. A press might be worth it.
I think I'll do a little more kitchen gadget window shopping!
Subscribe to:
Posts (Atom)